> ## Documentation Index
> Fetch the complete documentation index at: https://www.adaline.ai/docs/llms.txt
> Use this file to discover all available pages before exploring further.
# Run your first prompt
> Create and run your first prompt in the Adaline Playground
## 1. Sign up
If you don't have an Adaline account yet, create one by signing up at [app.adaline.ai](https://app.adaline.ai/sign-up?utm_source=adaline.ai).
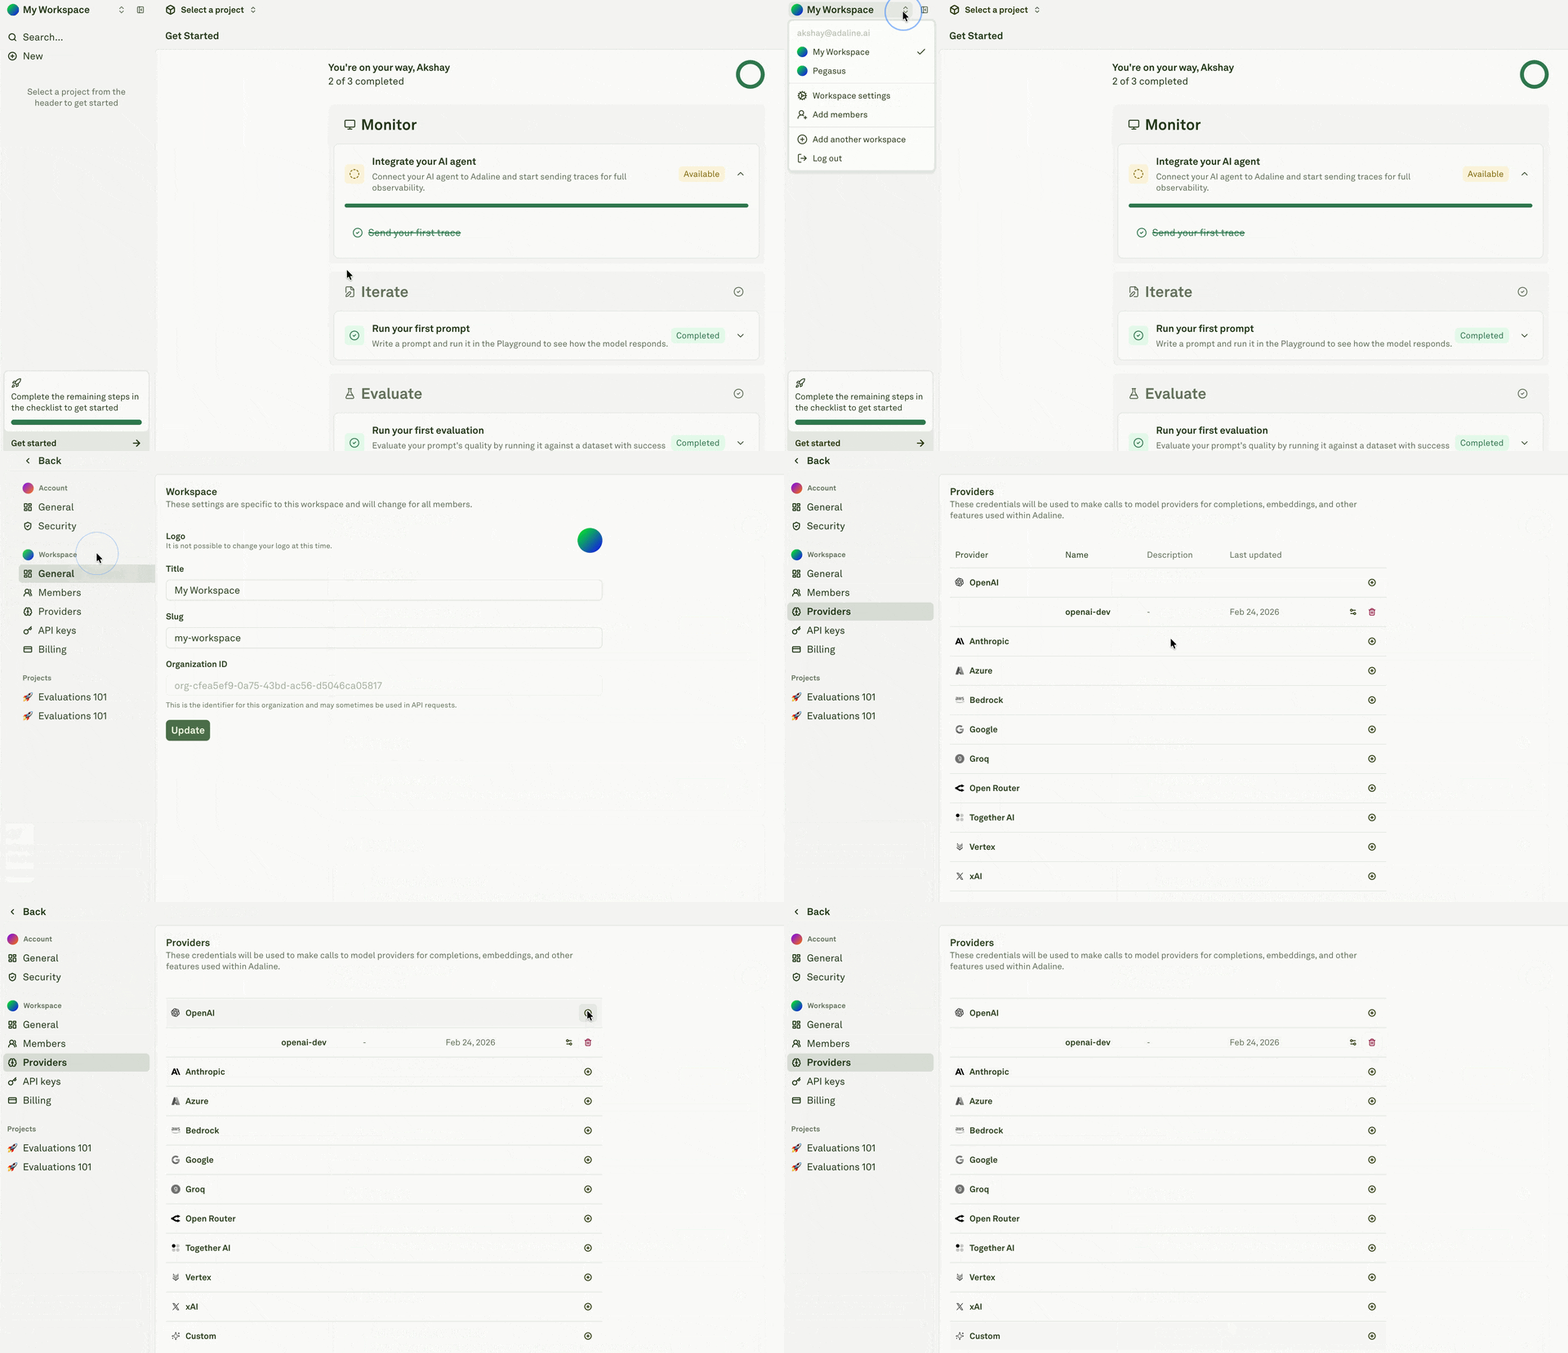
After you sign up and log in, Adaline creates a sample project called `Get Started`. Open the project picker dropdown and select `Get Started` to follow these quickstarts. The project includes starter resources you can use to run a prompt and try evaluations.
## 2. Setup an AI provider (optional)
New Adaline accounts include up to three free Playground and evaluation runs, so you can try the product before adding provider credentials. This step is optional for the first few runs, but highly recommended if you plan to keep using Playground, run evaluations, or enable continuous evaluations.
After the free runs are used, add your own AI provider credentials so Adaline can call the models you choose.
Open workspace settings, choose **Providers**, and add the provider credentials you want Adaline to use. For the full walkthrough, see [Configure AI provider](/docs/admin/configure-ai-provider/overview).
 ## 3. Setup your prompt
A project in Adaline can be considered as a representation of your AI agent (or application, workflow, etc.).
Or all the prompts, tools, evaluations, datasets, logs, etc. of an AI agent are contained within a project in Adaline.
After sign-up, open the project picker dropdown and select the sample project called `Get Started`.
The sample project includes a starter prompt and dataset. In this guide, open the prompt called `Prompt`.
Essentially, this is an AI agent with a single prompt.
Click on `Prompt` to open its editor (left) and playground (right):
## 3. Setup your prompt
A project in Adaline can be considered as a representation of your AI agent (or application, workflow, etc.).
Or all the prompts, tools, evaluations, datasets, logs, etc. of an AI agent are contained within a project in Adaline.
After sign-up, open the project picker dropdown and select the sample project called `Get Started`.
The sample project includes a starter prompt and dataset. In this guide, open the prompt called `Prompt`.
Essentially, this is an AI agent with a single prompt.
Click on `Prompt` to open its editor (left) and playground (right):
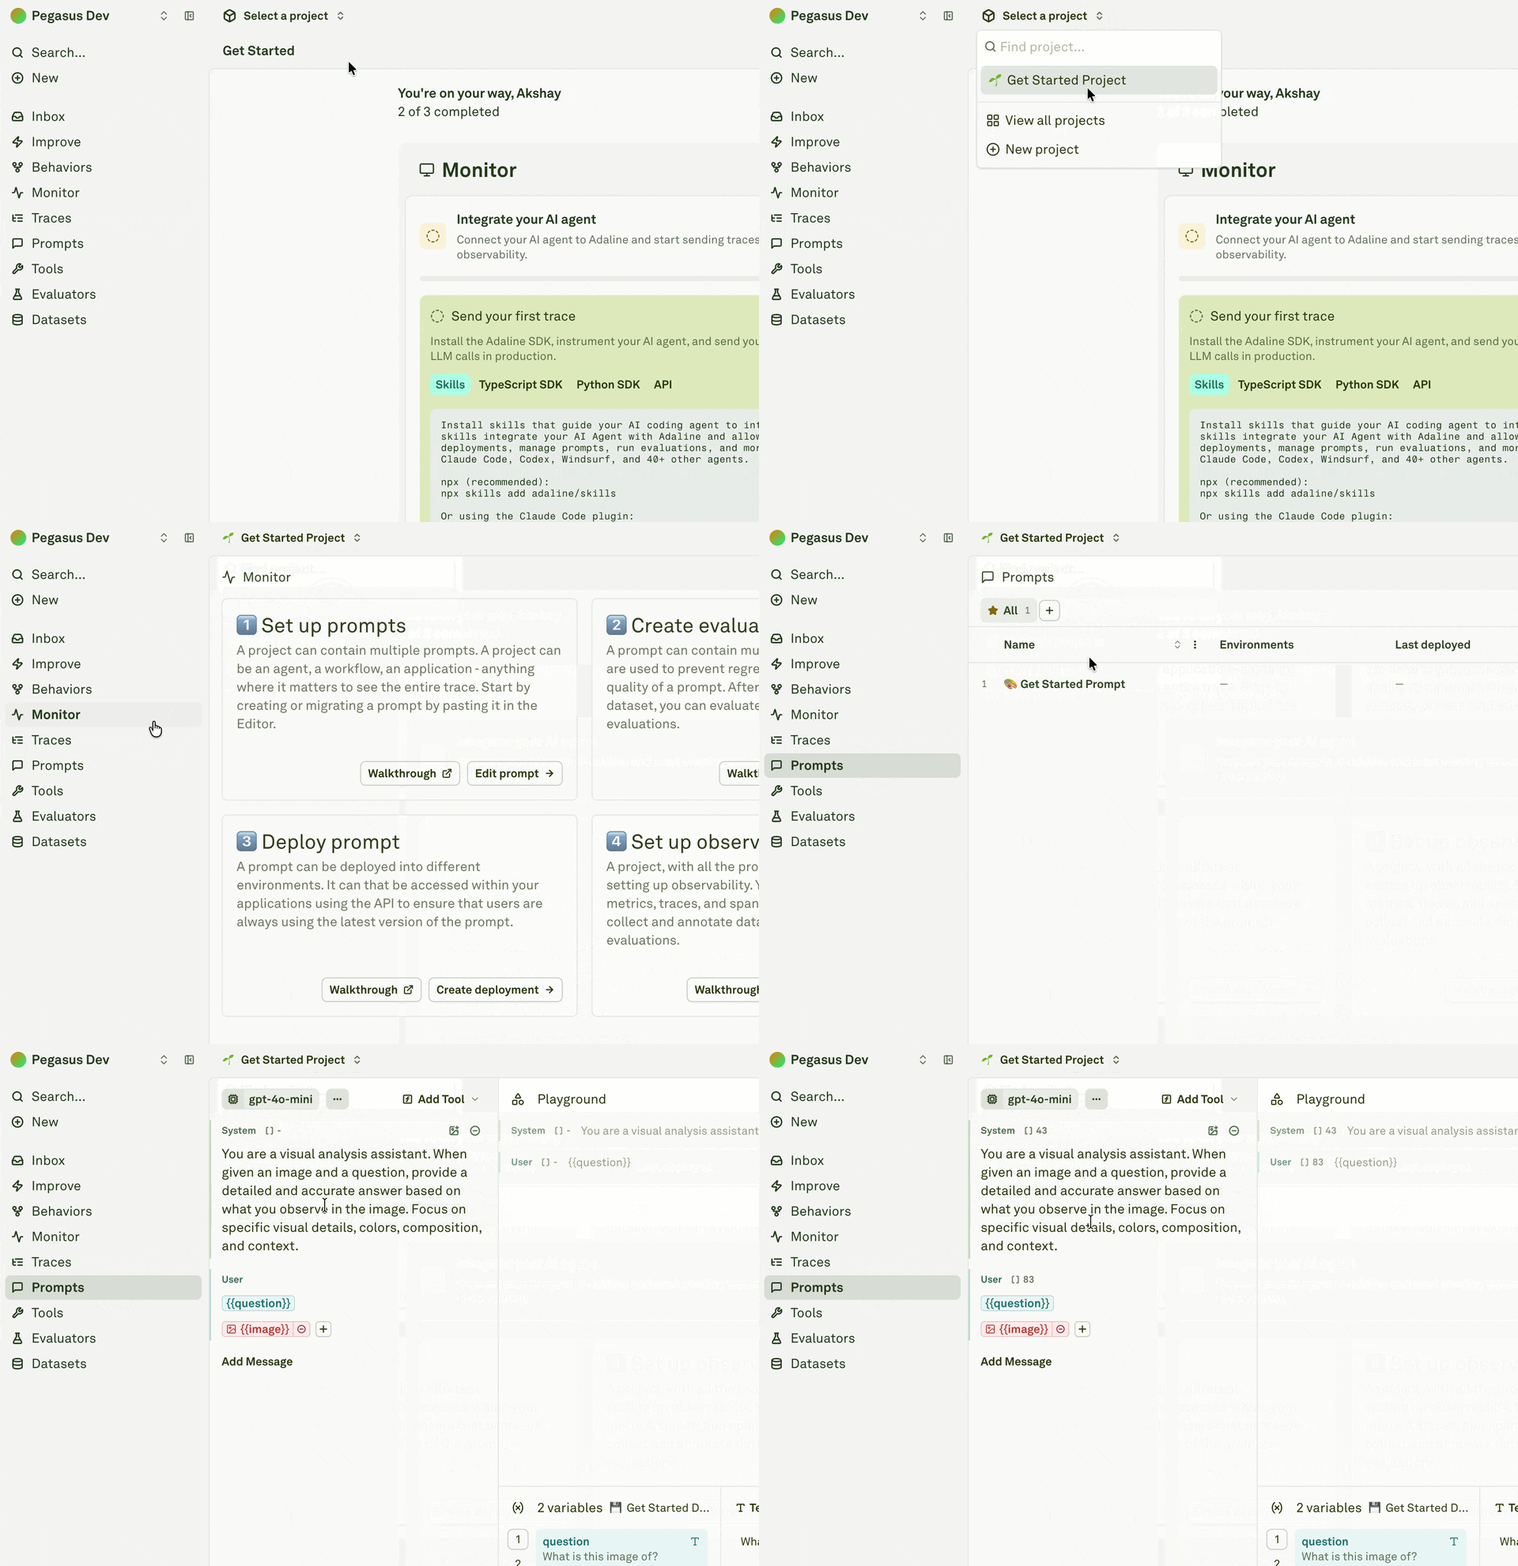 Click on `Select a model` and choose an available model. If you added an AI provider above, choose one of your configured models.
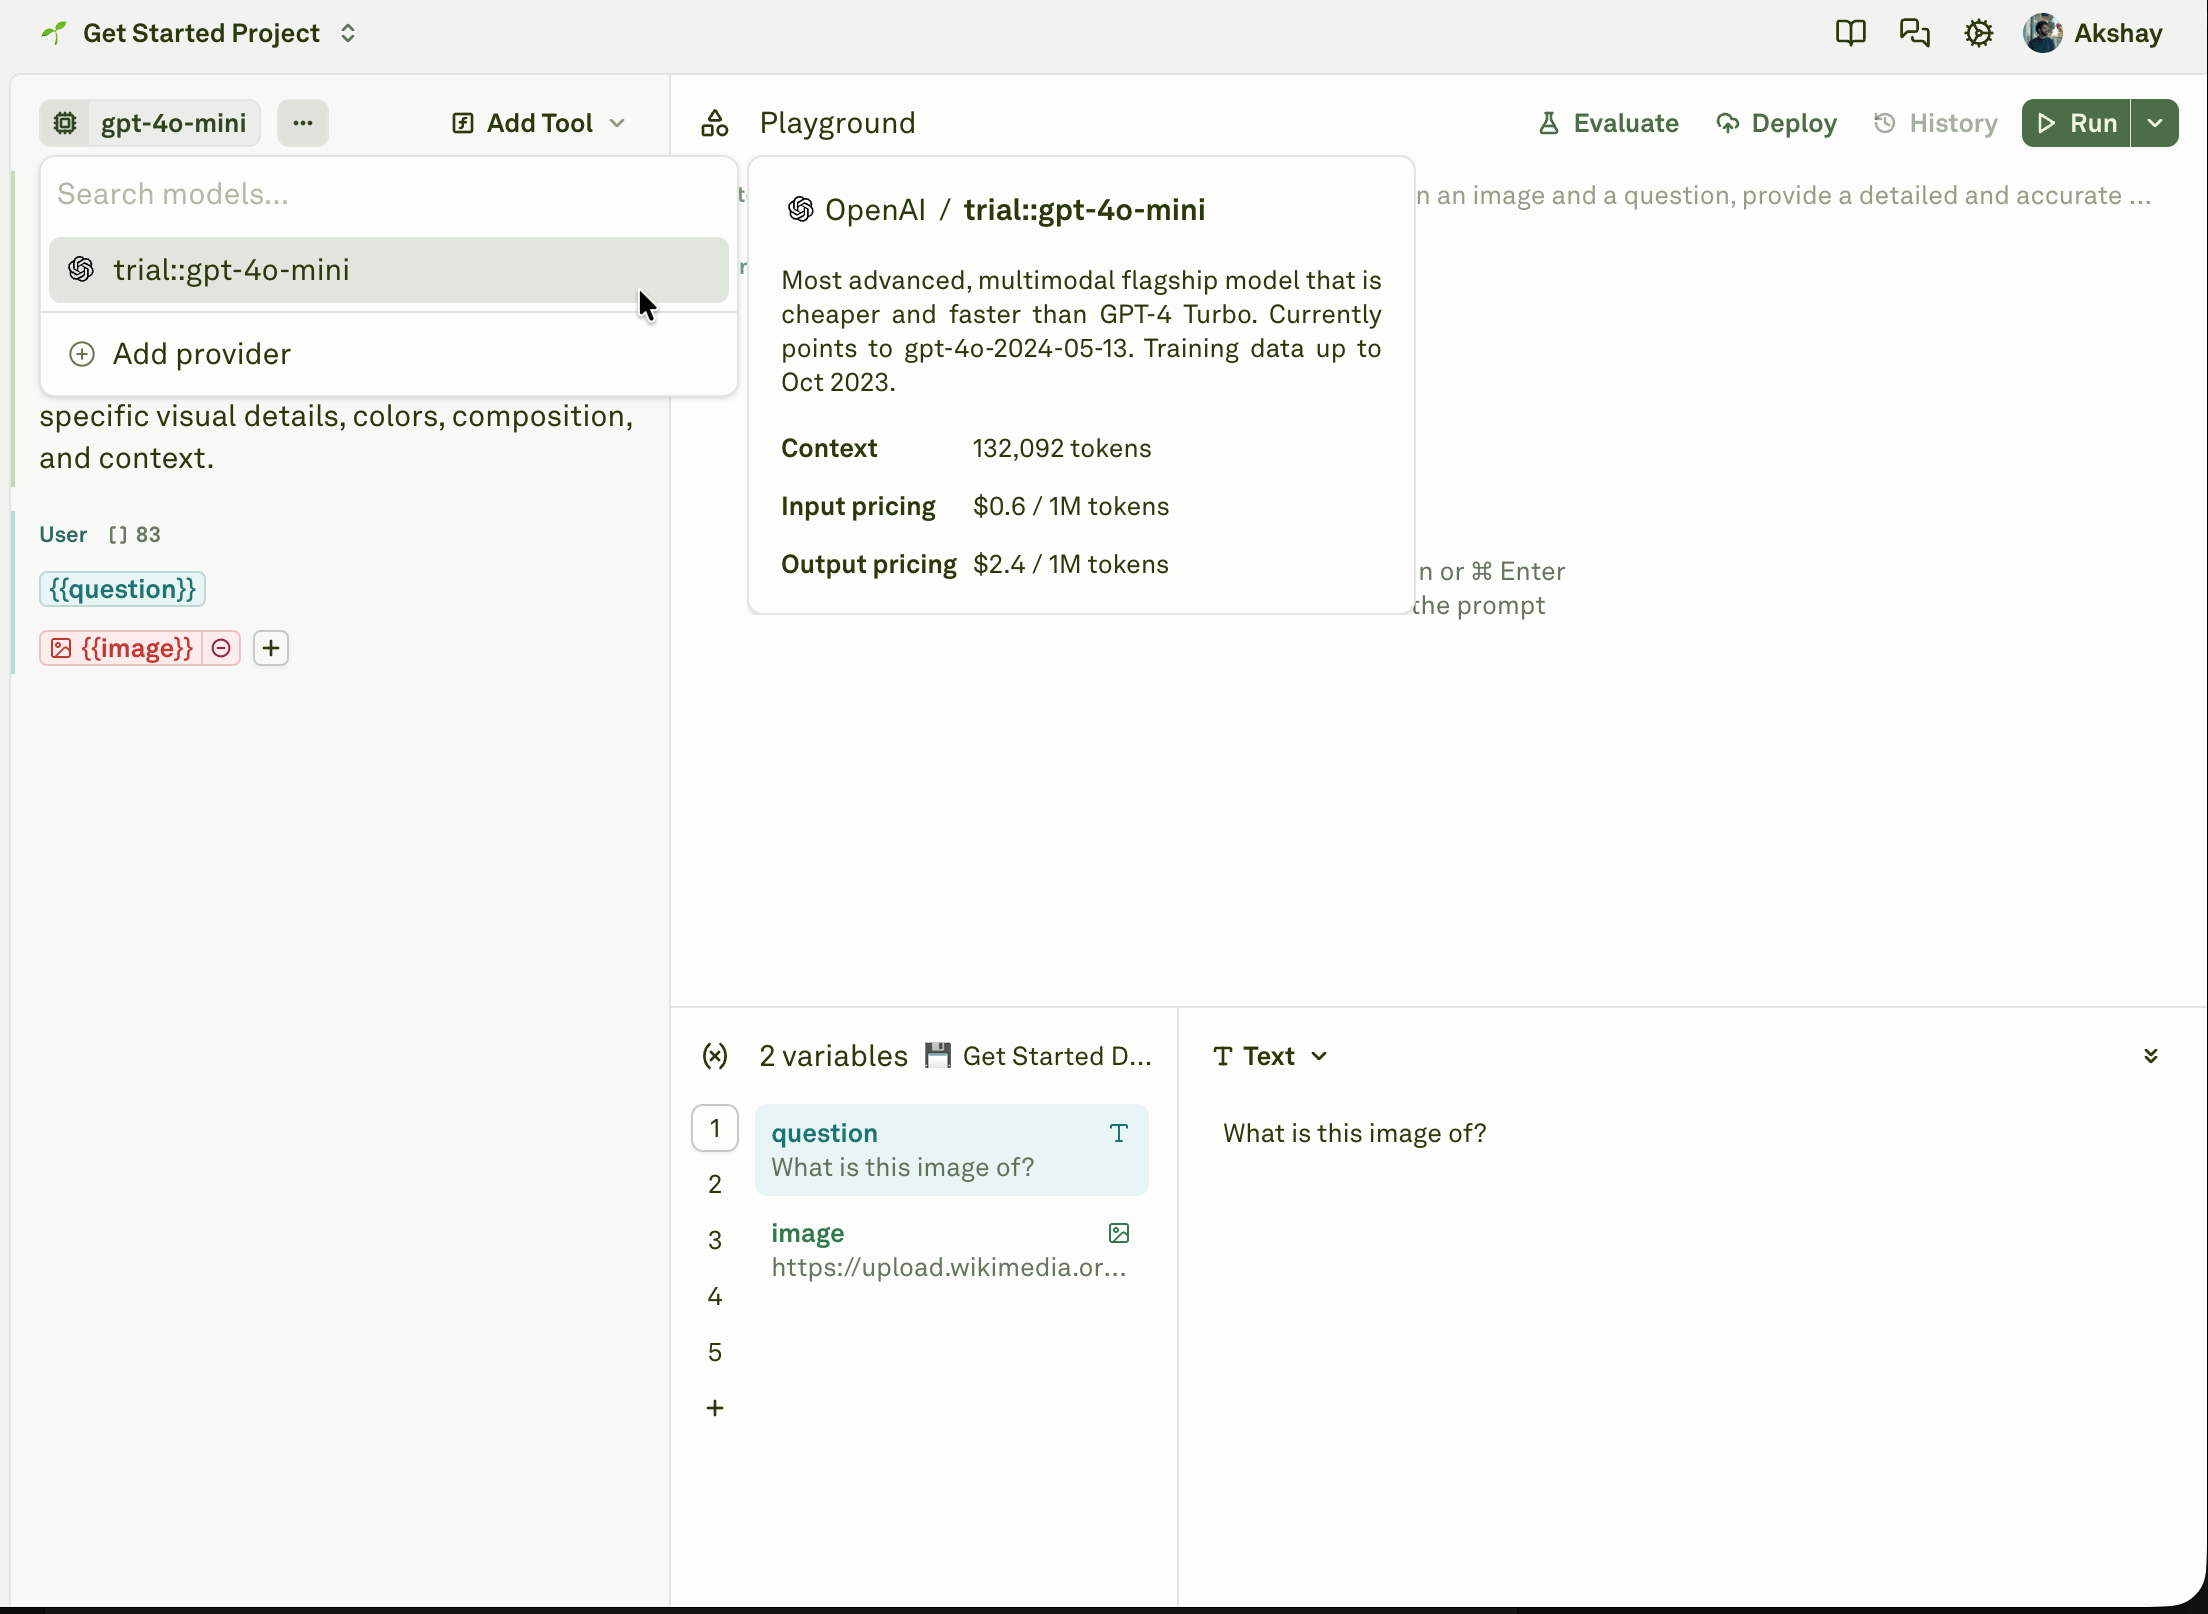 Click on ellipsis (three dots) next to the model to configure parameters such as temperature, max tokens, etc.
 **(Optional)**
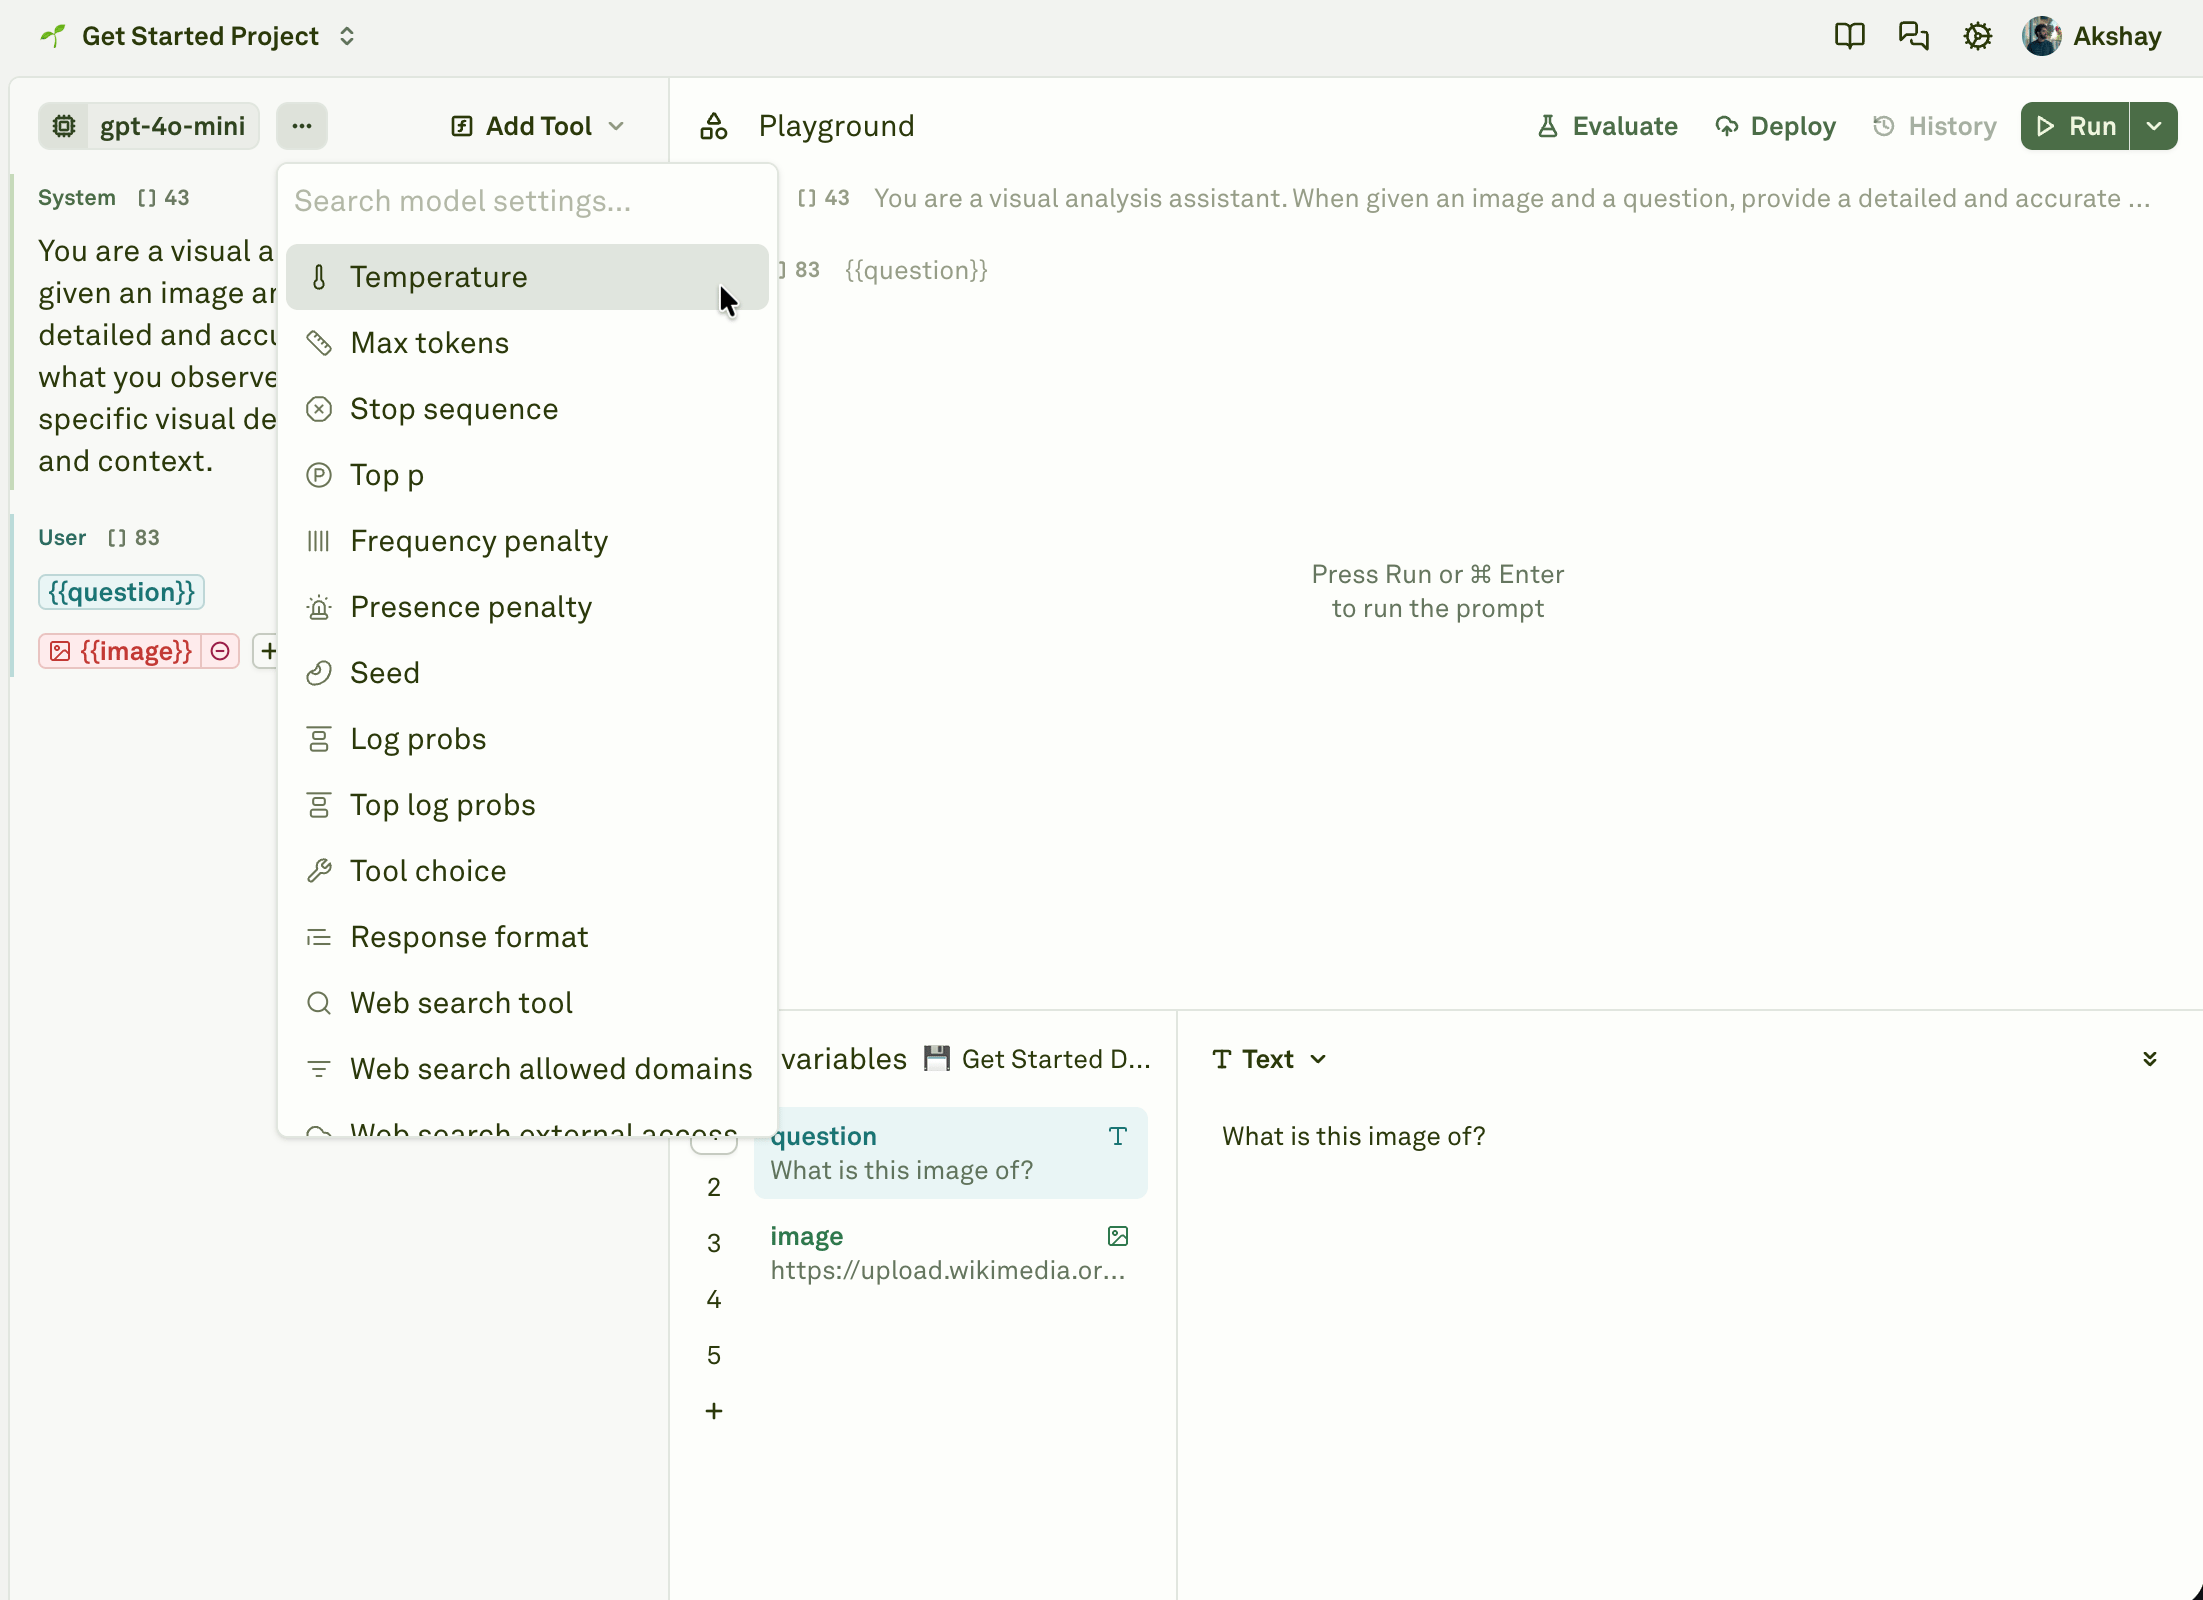
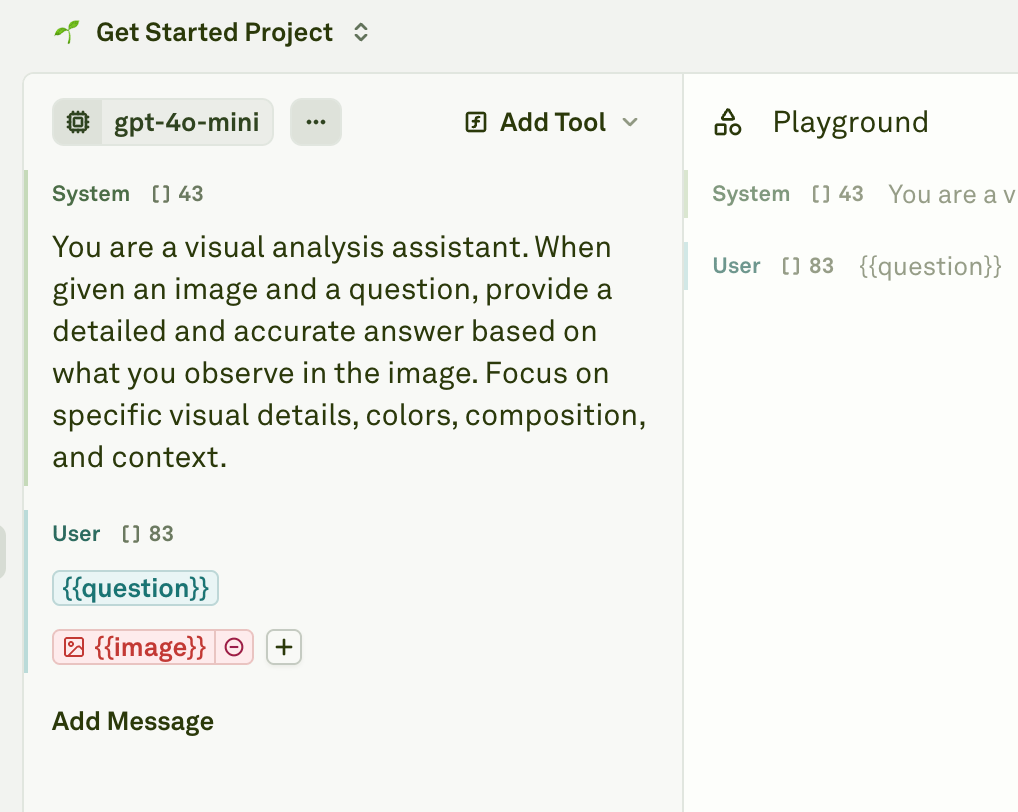
Update your prompt in the editor on the left. A prompt is made up of **messages**, each with a **role**:
* **System** — sets the AI's behavior, personality, and constraints. This message persists across conversation turns.
* **User** — represents the human input or question the AI should respond to.
* **Assistant** — defines the model's responses.
Use `{{variable_name}}` syntax to insert placeholders that will be replaced with actual values at runtime. For example, a user message might contain `{{question}}` to represent the question you want the model to answer.
The sample prompt already has a system message and a user message with a variable — feel free to edit them or start from scratch.
**(Optional)**
Update your prompt in the editor on the left. A prompt is made up of **messages**, each with a **role**:
* **System** — sets the AI's behavior, personality, and constraints. This message persists across conversation turns.
* **User** — represents the human input or question the AI should respond to.
* **Assistant** — defines the model's responses.
Use `{{variable_name}}` syntax to insert placeholders that will be replaced with actual values at runtime. For example, a user message might contain `{{question}}` to represent the question you want the model to answer.
The sample prompt already has a system message and a user message with a variable — feel free to edit them or start from scratch.
 **(Optional)**
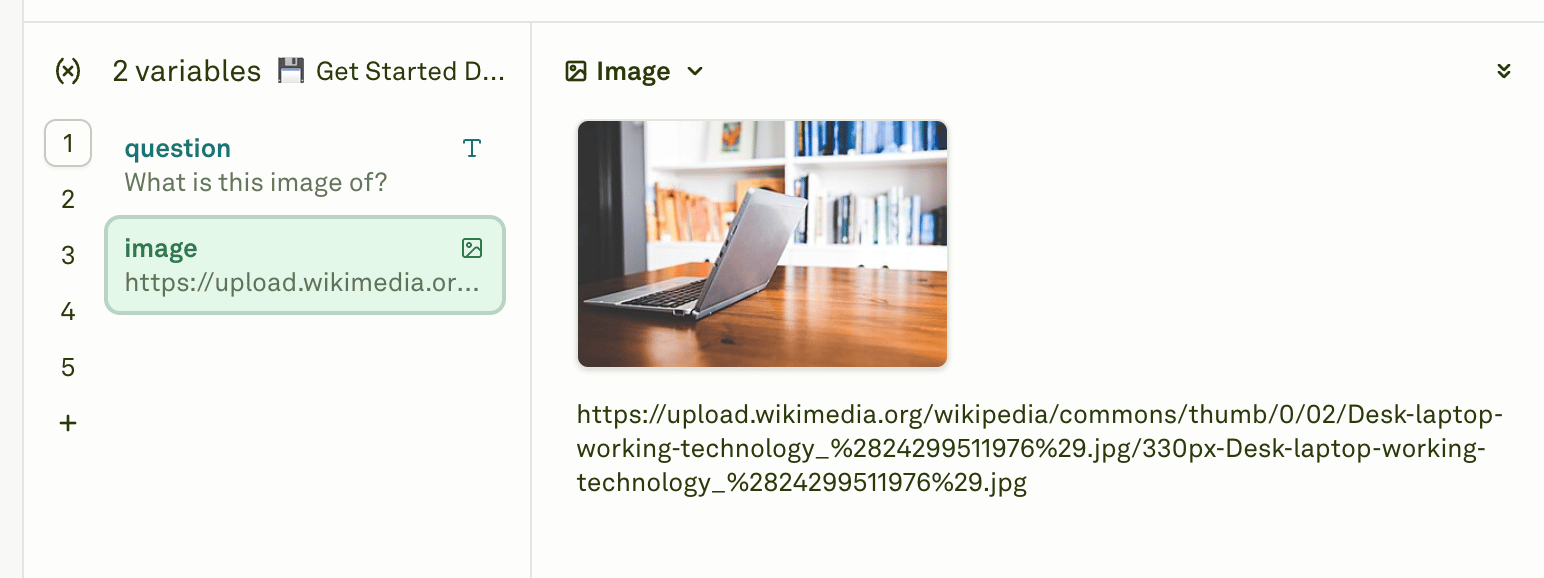
Update the prompt variables in the **Variables** section in the bottom right to any value you want to test your prompt with.
Variables are the runtime values that replace `{{placeholders}}` in your messages. They typically represent end-user inputs, additional context, or outputs from previous prompts.
**(Optional)**
Update the prompt variables in the **Variables** section in the bottom right to any value you want to test your prompt with.
Variables are the runtime values that replace `{{placeholders}}` in your messages. They typically represent end-user inputs, additional context, or outputs from previous prompts.
 ## 4. Run your Prompt
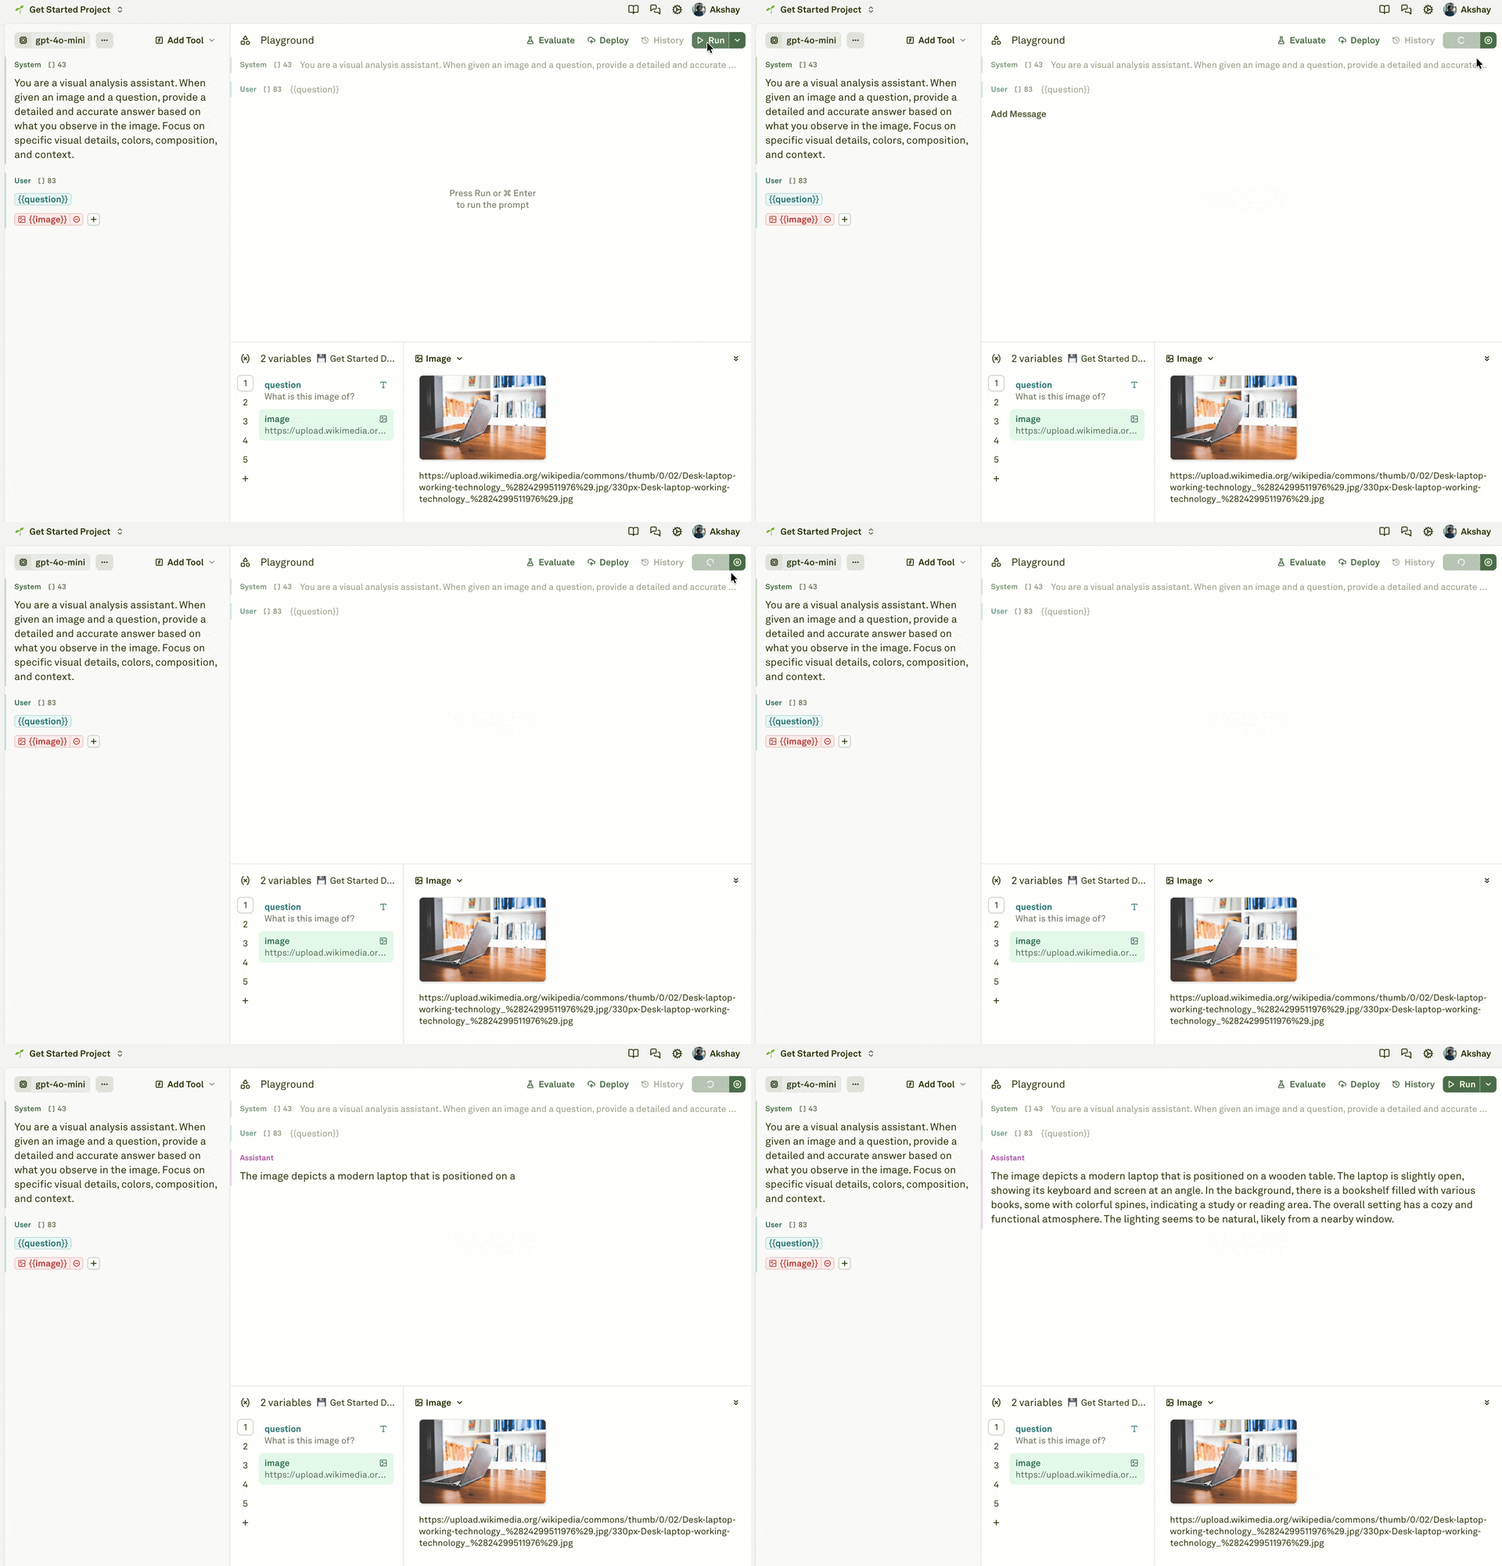
Click on **Run** button (top right) or press Cmd + Enter or Ctrl + Enter to run your prompt.
Within seconds, you will start seeing the model's response streaming in the playground with the role `Assistant`.
## 4. Run your Prompt
Click on **Run** button (top right) or press Cmd + Enter or Ctrl + Enter to run your prompt.
Within seconds, you will start seeing the model's response streaming in the playground with the role `Assistant`.
 Congratulations! You just ran your first prompt in Adaline.
Next, run the [Run your first evaluation](/docs/get-started/run-your-first-evaluation) quickstart to add evaluators that measure your prompt's quality and performance. When Adaline has evaluators that match your prompt and production traffic, Improve cycles have stronger evidence for judging candidate prompt changes.
Read more about [Prompts](/docs/prompts/overview)
Congratulations! You just ran your first prompt in Adaline.
Next, run the [Run your first evaluation](/docs/get-started/run-your-first-evaluation) quickstart to add evaluators that measure your prompt's quality and performance. When Adaline has evaluators that match your prompt and production traffic, Improve cycles have stronger evidence for judging candidate prompt changes.
Read more about [Prompts](/docs/prompts/overview)