> ## Documentation Index
> Fetch the complete documentation index at: https://www.adaline.ai/docs/llms.txt
> Use this file to discover all available pages before exploring further.
# Configure environments
> Create and manage isolated deployment environments for your AI applications
Deployment environments in Adaline are isolated containers for specific prompt versions.
They allow you to safely manage different versions of your prompts across stages like development, staging, and production — each integrated independently into your AI applications or CI/CD pipelines.
Environments are owned and maintained at the project level.
In other words, all the prompts within a project share the same environments.
This is because each project is akin to an AI agent, and each environment is a separate, isolated instance of that agent.
## Create a new environment
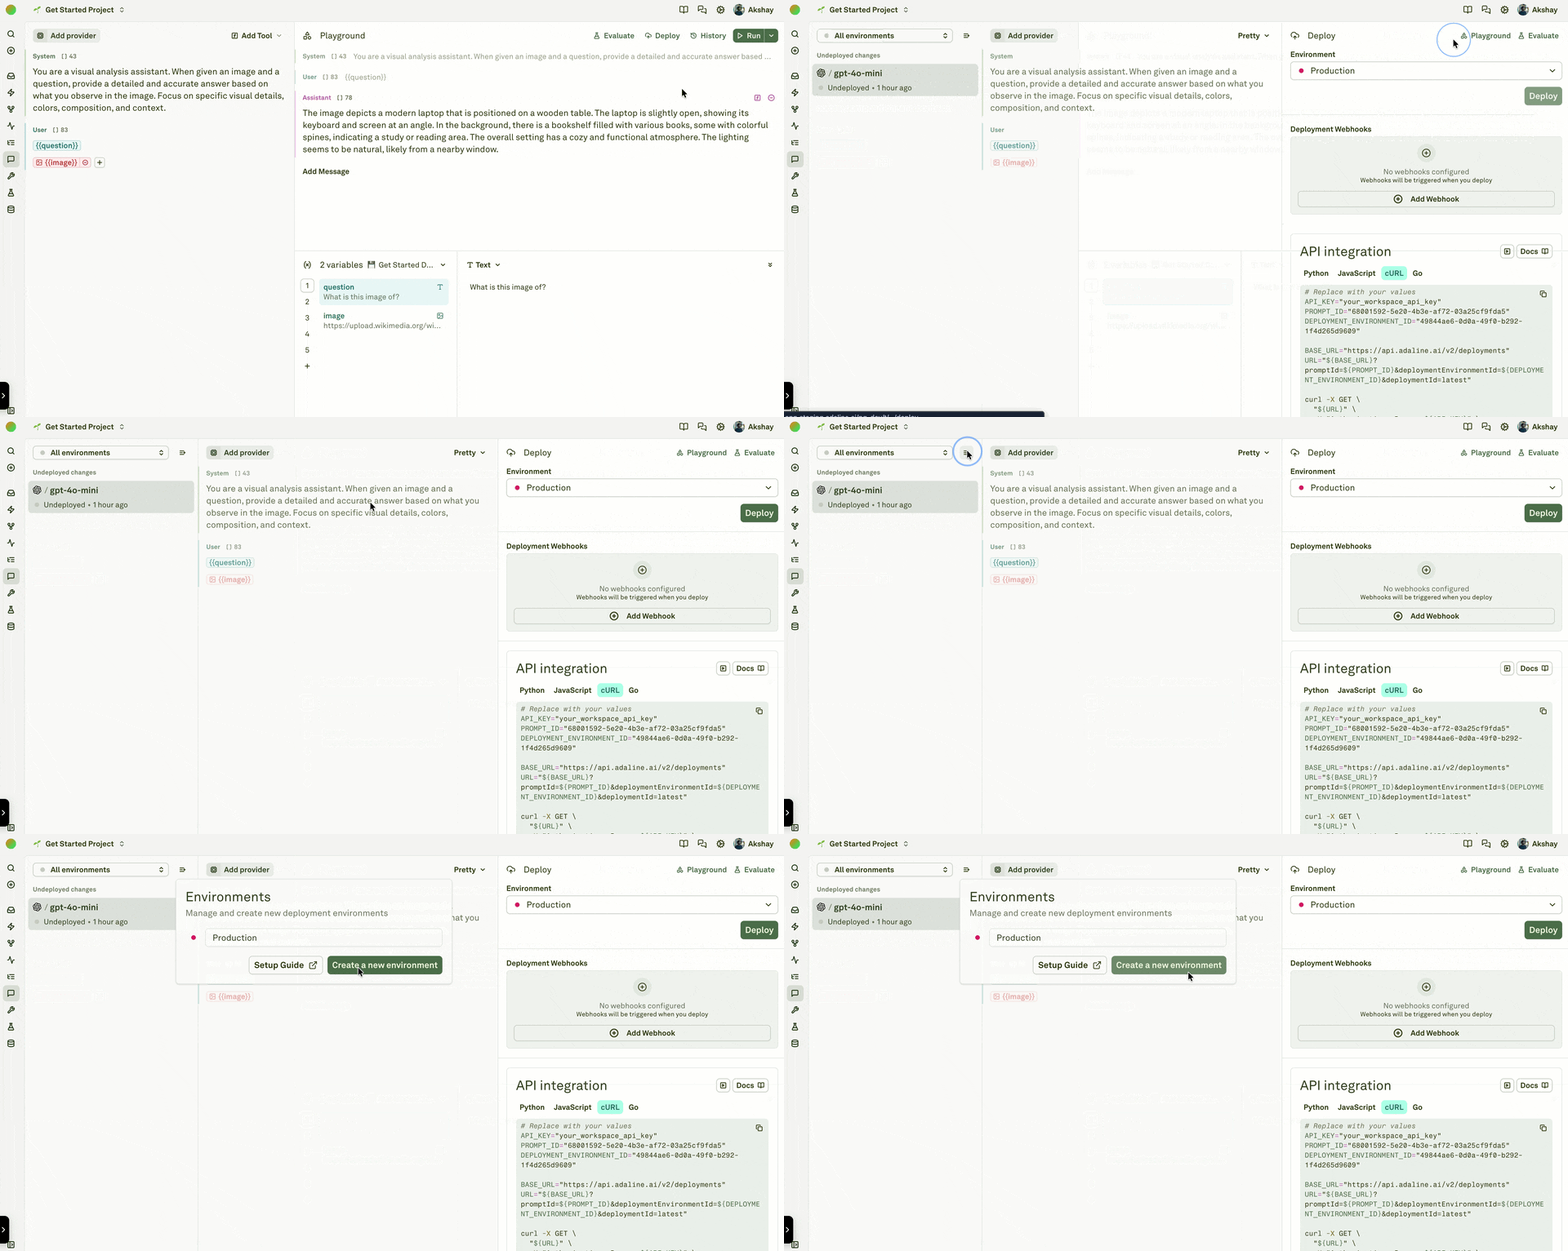
To create a new environment, click **Create a new environment** from the Deploy page:
 Give your environment a descriptive name:
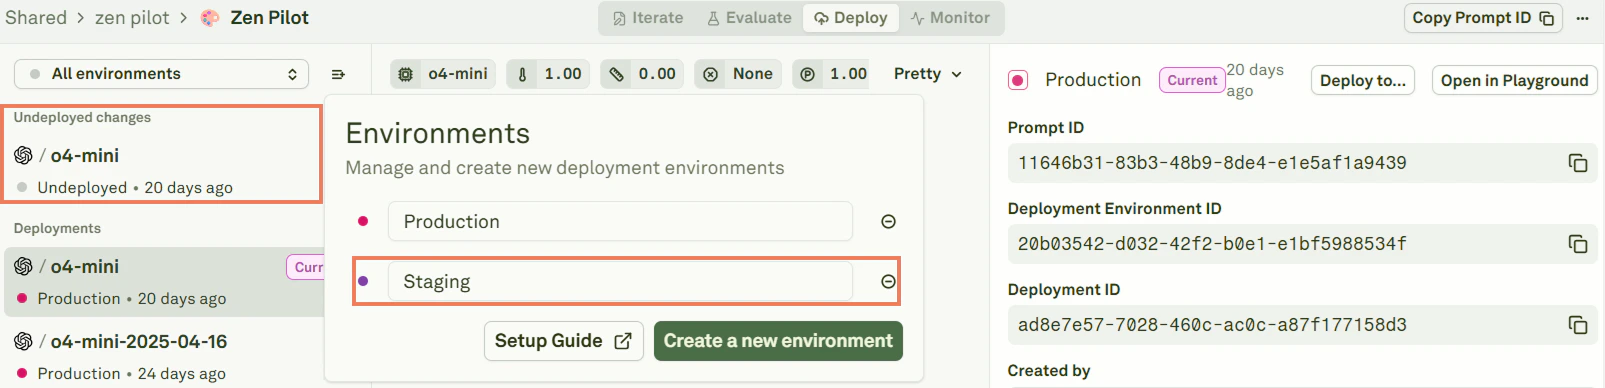 When you create a new environment, the content of the currently selected deployed environment is transferred to it. This is why you will see a new space with **Undeployed changes** — these represent the prompt version ready to be [deployed](/docs/deploy/deploy-your-prompt) to the new environment.
## View all environments
Click **All environments** to see every environment configured for your project:
When you create a new environment, the content of the currently selected deployed environment is transferred to it. This is why you will see a new space with **Undeployed changes** — these represent the prompt version ready to be [deployed](/docs/deploy/deploy-your-prompt) to the new environment.
## View all environments
Click **All environments** to see every environment configured for your project:
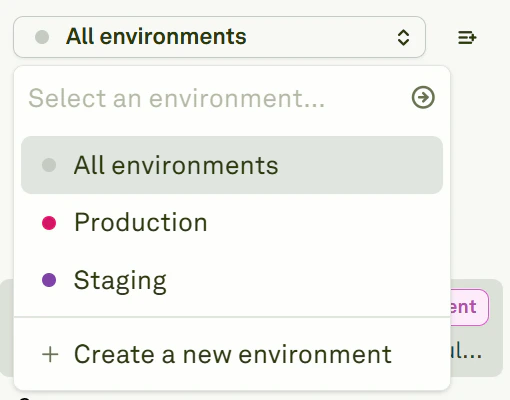 From this view you can create additional environments, switch between them, or [compare deployments](/docs/deploy/compare-your-deployments) across environments.
## Delete an environment
To delete an environment, click the minus sign next to its name:
From this view you can create additional environments, switch between them, or [compare deployments](/docs/deploy/compare-your-deployments) across environments.
## Delete an environment
To delete an environment, click the minus sign next to its name:
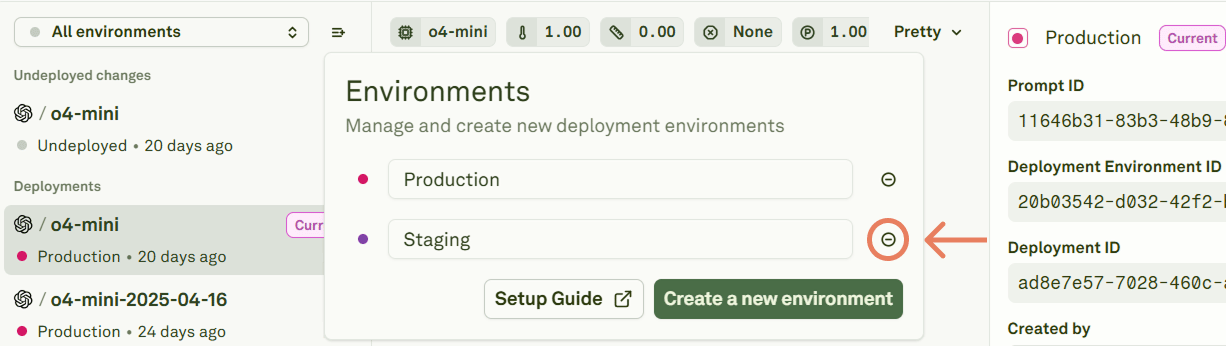 Deleting an environment also deletes **all deployments** within that environment across all prompts in the project. Any API or SDK calls targeting this environment will fail after deletion. This action cannot be undone.
## Next steps
Ship prompts to your configured environments.
Set up real-time notifications for deployments.
Deleting an environment also deletes **all deployments** within that environment across all prompts in the project. Any API or SDK calls targeting this environment will fail after deletion. This action cannot be undone.
## Next steps
Ship prompts to your configured environments.
Set up real-time notifications for deployments.